Posted by Curry S. on Jan 28th 2020
Make Your Own Soap!
It's the season of giving and what's better than giving a gift you made yourself and can even help fend off that annoying winter cold. These DIY soaps make a great stocking-stuffers, Secret Santa or Yankee Swap gifts, or it can make the perfect personal touch to your kitchen or bathroom for that holiday party you’re hosting.
Supplies:
Liquid Colorant
Soap Base
Soap Additive
Embossing Mold
Spoon and/or Whisk
Glass Measuring Cup/Heat Resistant Bowl
Make your soap!
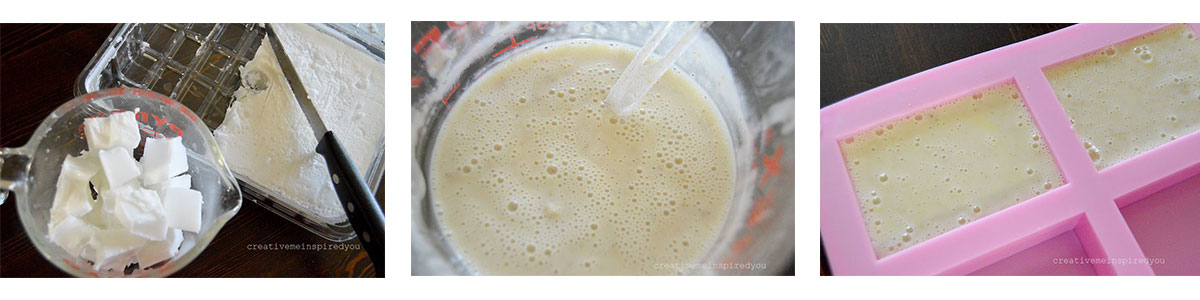
- Cut your soap into cubes, cover your heat-proof bowl/measuring cup with Saran Wrap. Add the cubes to the measuring cup/bowl and microwave in 30 second increments, stirring until smooth, not allowing the soap to bubble. This should take a little over 60 seconds.
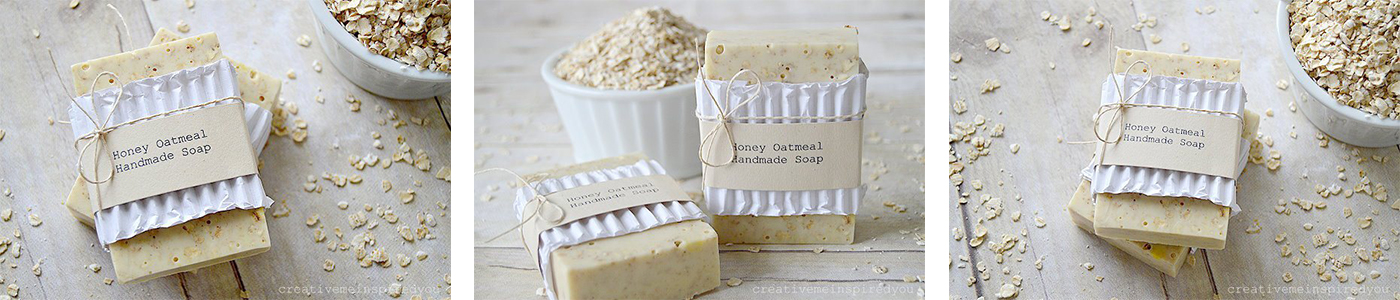
- Once melted, add any liquid colorant, essential oils and any other additives you would like such as dried lavender leaves, crushed apricot seeds, or oatmeal to the soap base. Mix together.
- Once mixed, pour your soap base into the embossing mold.
 Allow to
set for at least 20 minutes, then place in a cool spot to dry for at least
three hours, and up to three days. Wrap the
soap any way you’d like! You can use Shizen Paper, twine or ribbon to
add a special, decorative touch to your soap.
Allow to
set for at least 20 minutes, then place in a cool spot to dry for at least
three hours, and up to three days. Wrap the
soap any way you’d like! You can use Shizen Paper, twine or ribbon to
add a special, decorative touch to your soap.
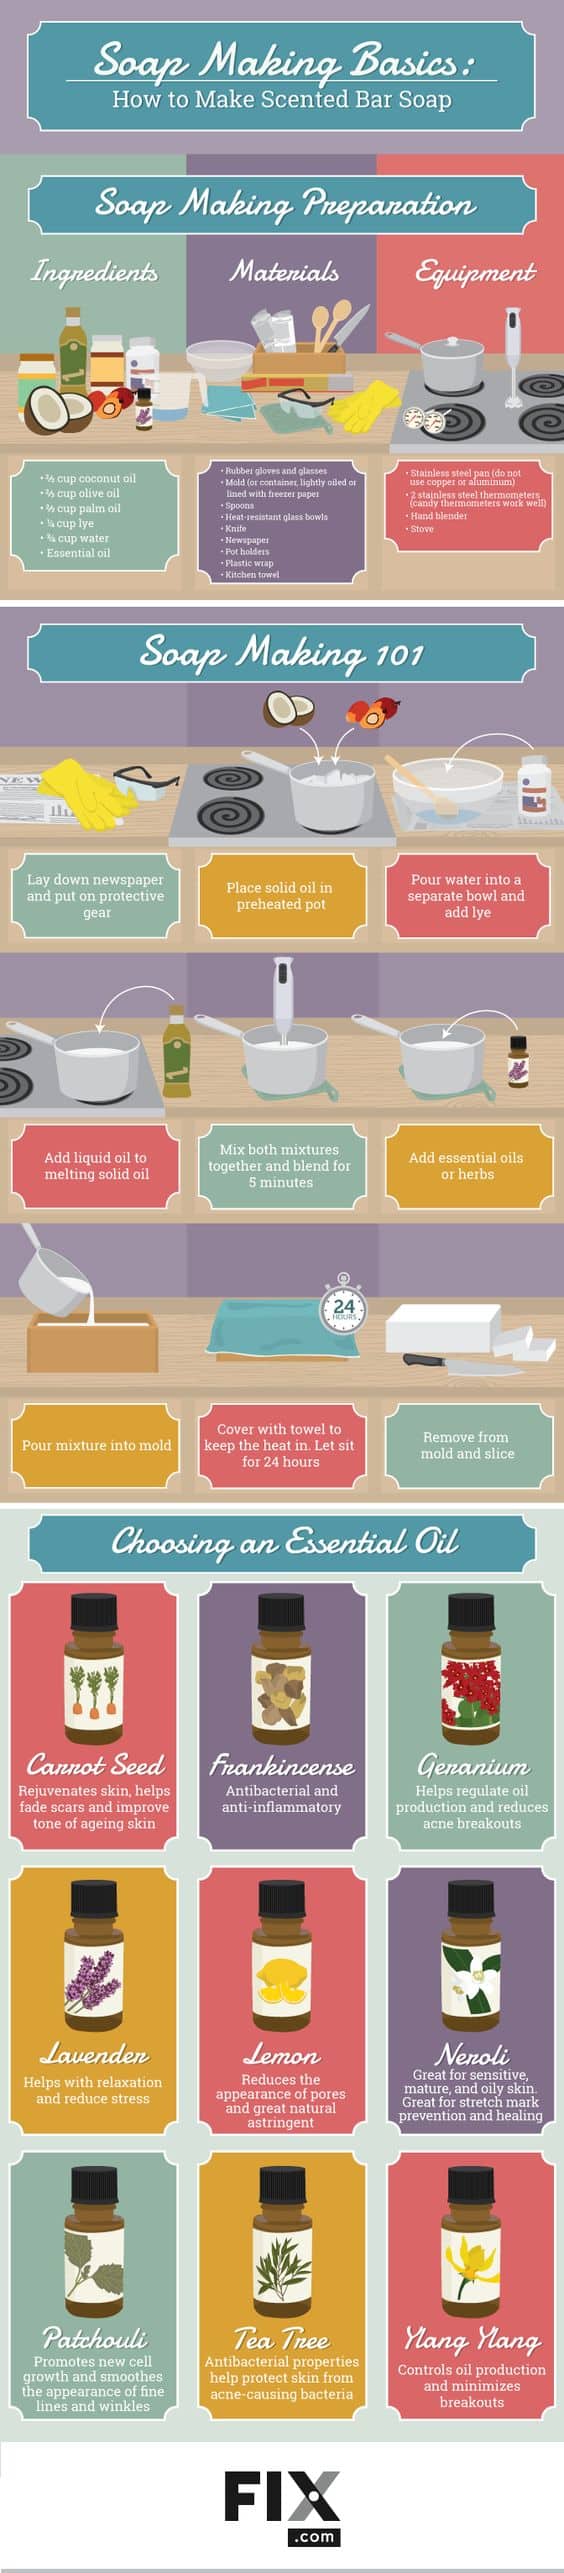
This DIY was adapted from Creative Me Inspired You. Take a look at this great infographic for even more soap inspo!