Posted by Curry S. on Jan 28th 2020
Papier Mache Letter DIY
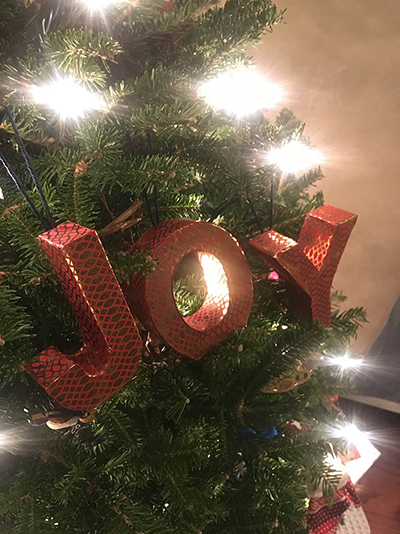
The holidays are here and we’re feeling festive! This simple DIY is perfect for adding a little sparkle to holiday mantles, table settings and more. Personalize it by spelling out a name or make ornaments with your initials. The options are endless with these DIY papier mache letters!
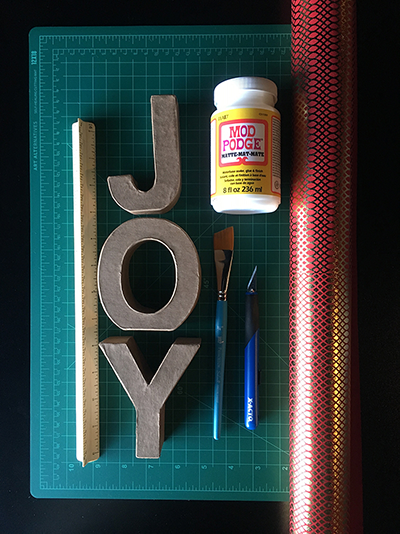
Supplies
Paper Mache Letters
Foam Brush
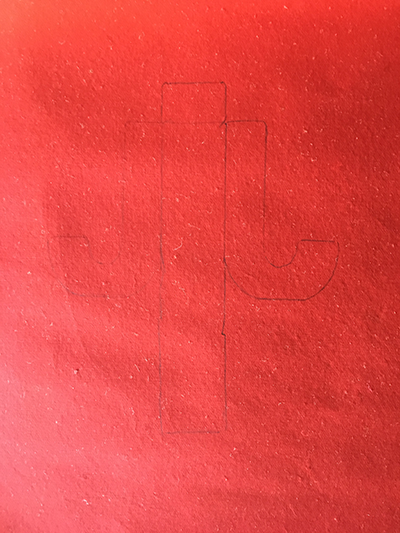
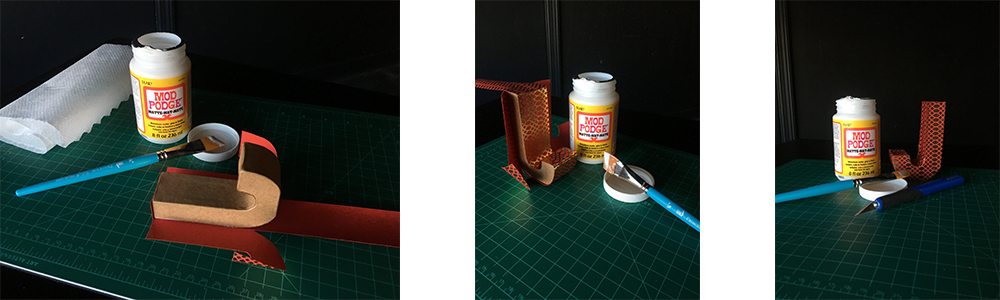
Take your paper and lay it patterned-side-down. Place your letter on top of it and lightly trace the outer shape of the letter with a pencil. Turn the letter on its sides and trace the side edges before returning to its original spot. Keep flipping and tracing all around the edges of the letter.
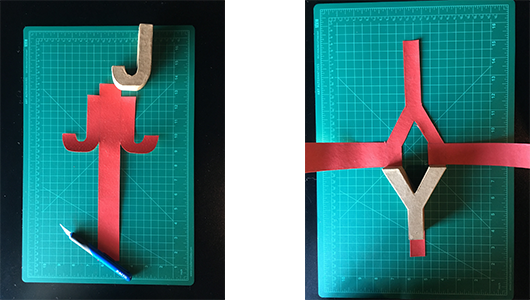
Using your X-Acto knife and ruler, cut out the paper based on the lines you traced. You should have an outline of the letter, with some extra “flaps” to cover the smaller flat surfaces of the letter.
Lightly coat the front of your letter using the Mod Podge and paint brush and adhere the paper letter to the papier mache. Allow a minute or two to let it dry.
Fold (and cut) so that the sides will be covered, gluing as you go. If applicable, do two parallel sides then the top and bottom so that your wraparound corners will look symmetrical.
If your letter has a counter (the fully enclosed space within a letter) like an A, B, D etc. then you will not have a fold to cover the inside of it. You can either fill this in using paint, or cut a piece of your paper to fit inside of it. Since mine was a simple “O”, I cut a strip of paper to fit the inside.
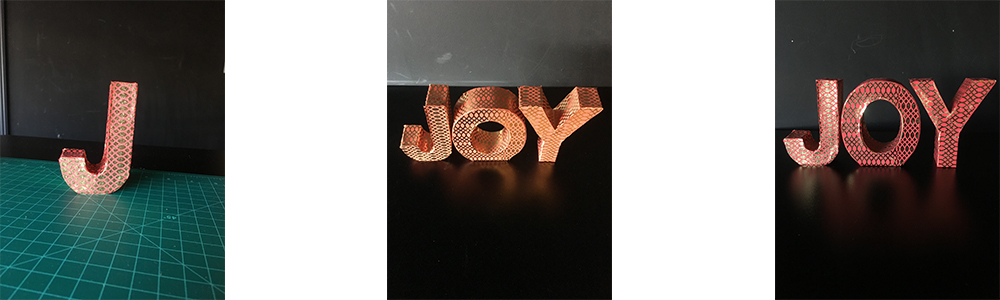
Once you're finished, check the letter and trim off any excess paper. You can also coat the paper in a thin layer of Mod Podge. This DIY was adapted from this Paper Mache Letter Tutorial from Crafty Steals.