Posted by Curry S. on Jan 22nd 2020
DIY Gilded Easter Eggs with Sepp Leaf
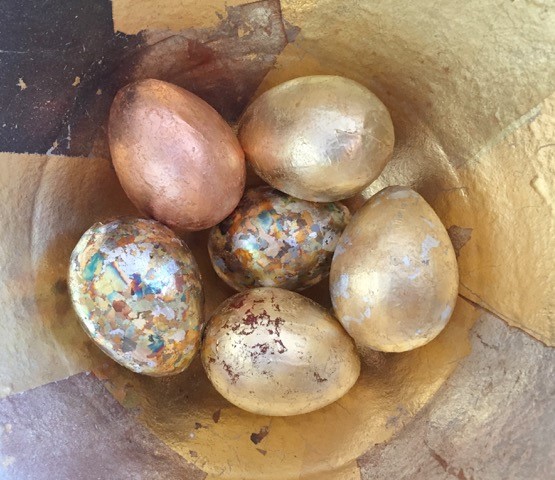
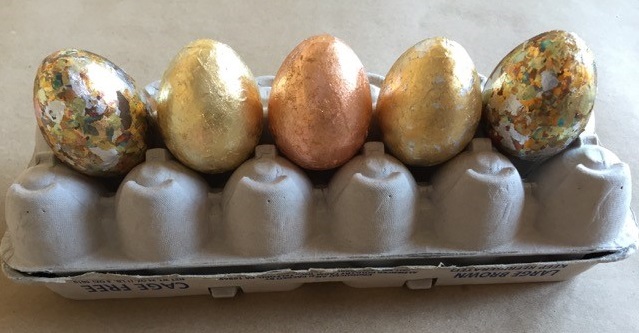
For this DIY blog, Sepp leaf is going to show us how to gild paper mache Easter Eggs using Sepp Leaf Gilding Workshop Tamisé Flakes. Paper mache eggs have a texture that is ideal for use with colorful, sparkling Tamisé!
Supplies:
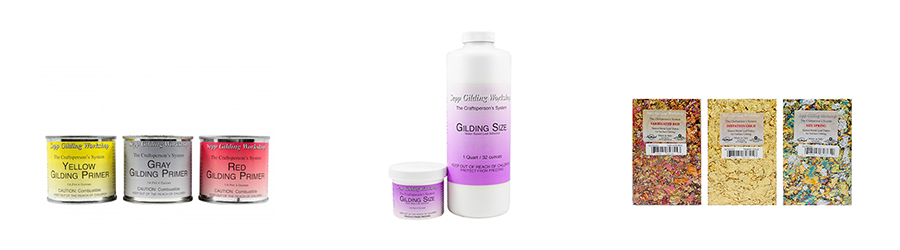
Sepp Leaf Water-Based Gilding Size
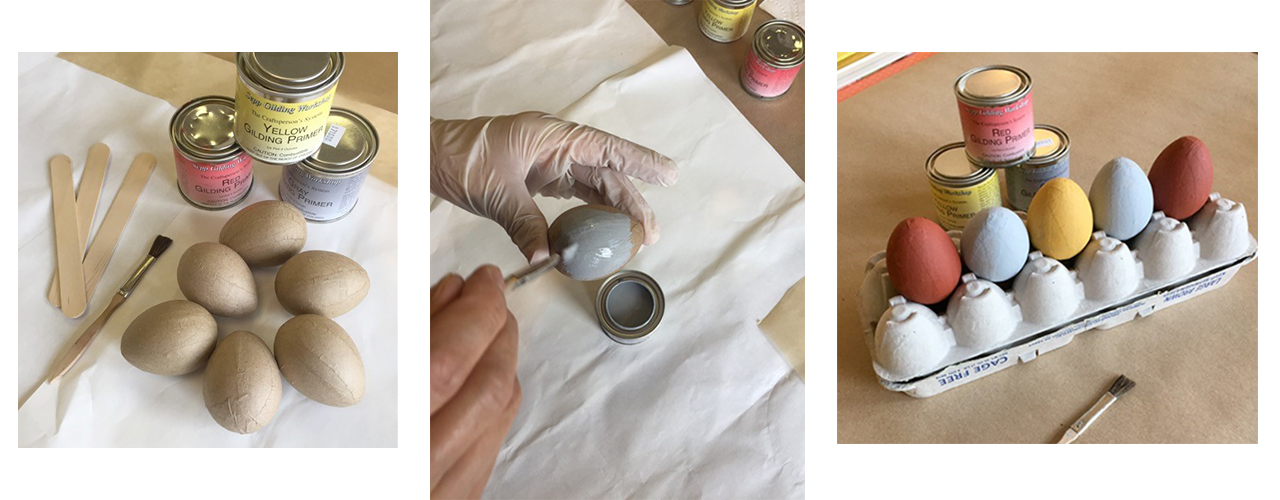
Wooden and/or Paper Mache Eggs
Directions:
Using a brush, prime with Sepp Gilding Workshop (SGW) oil-based yellow, red or gray primer – one coat should be enough. Let dry about one hour. You can also use an acrylic paint color of your choice.
Use a brush to apply water-based SGW Gilding Size to one half of each egg. You can rest the eggs on wax paper or use an egg box stand like we did. This size stays sticky indefinitely. When the size goes from milky-white to clear, flip each egg over and size the rest. Once this last application turns clear, you are ready to gild! Keep a jar of water handy to soak the brush between size applications.
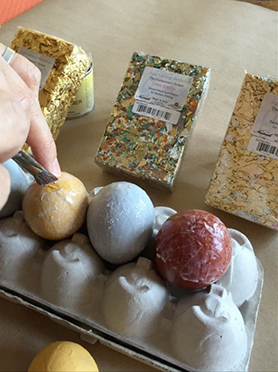
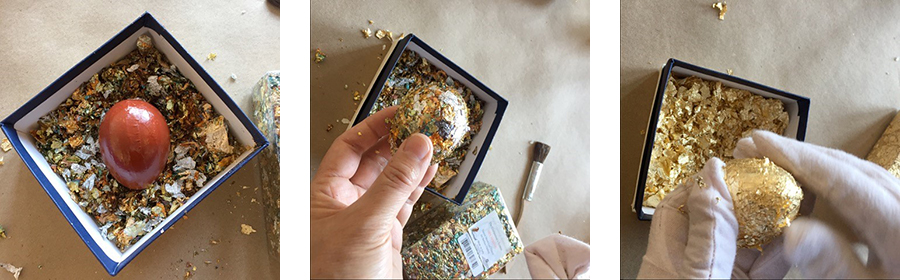
Shake some Tamisé flakes into a small box. Swirl the egg around in the flakes. You can completely cover the primer color with flakes or let the color peek through. Use cotton gloves and/or a firm brush to brush off excess flakes. Return each batch of unused flakes to its own box for future use. You can mix flake colors together as well!
If you'd like, you can topcoat the gilded eggs with SGW Acrylic Clear Coat. Let dry for a few hours before setting out as decoration.
For this project, we used Tamisé Imitation Gold, Mix Gold (which has small bits of Imitation Silver), Mix Spring and Copper. There is a wide variety of colors to choose from. These gilded eggs are a beautiful way to celebrate Spring and so much more!